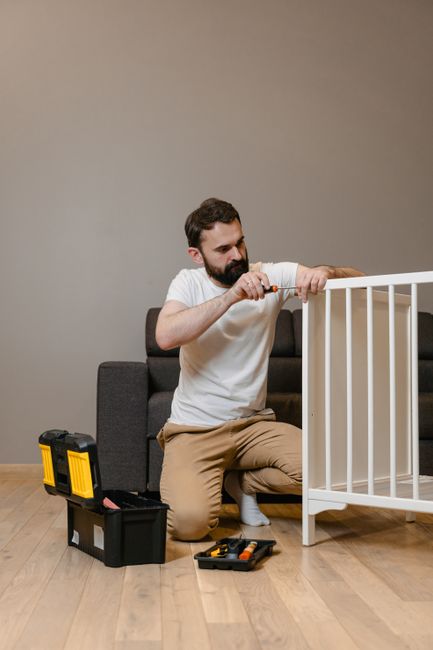
Safe disassembly and reassembly for complex furniture
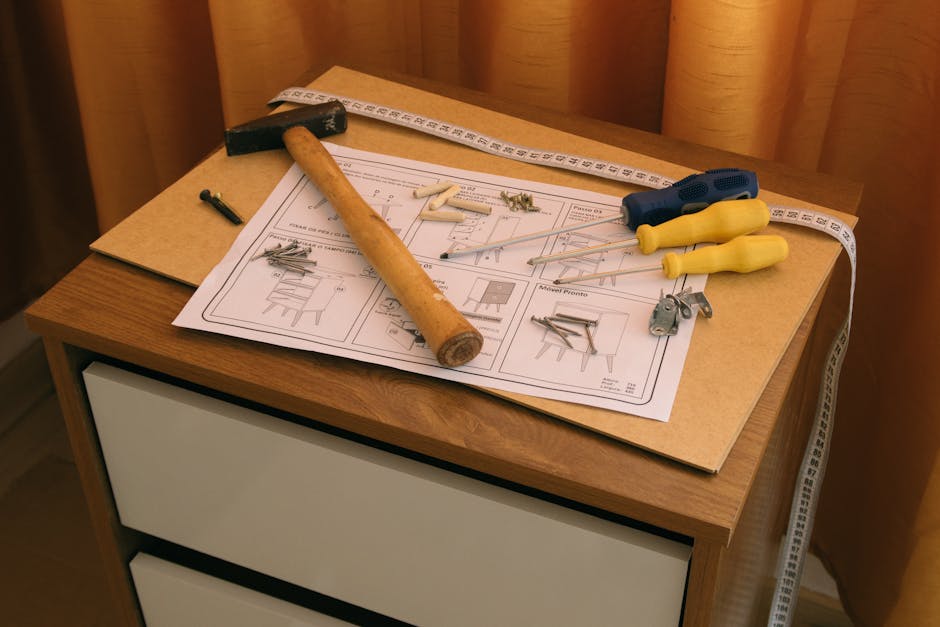
Moving a sofa is one thing. Taking apart a fitted wardrobe, a modular wall unit, a large bed frame with drawers, or a conference table with hidden fixings is another matter entirely. Safe disassembly and reassembly for complex furniture is about protecting the furniture, the property, and the people handling it. Done well, it saves time later, reduces damage, and makes the whole move feel a lot less chaotic. Done badly, it can lead to split panels, missing fittings, misaligned doors, and that sinking feeling when a piece no longer goes back together as it should.
This guide walks through the full process in plain English: why it matters, how the job works, what tools help, where people usually go wrong, and when it makes sense to hand the work to experienced movers. If you are planning a house move, an office relocation, or a one-off furniture pick-up, you will find practical advice you can use straight away. And yes, there is a right way to label one hundred tiny screws without losing your mind. Mostly.
Why Safe disassembly and reassembly for complex furniture Matters
Complex furniture is usually designed to look seamless, not to come apart in a hurry. That means hidden brackets, cam locks, dowels, runners, hinge plates, cable ports, and all sorts of fixings that can be easy to misread if you are working fast. A single mistake can turn a perfectly good unit into a wobbly headache.
Safety matters first. Large pieces can be heavier than they look once partially dismantled. Panels may flex unexpectedly. Glass doors, mirrors, and veneer surfaces chip easily. If you are dealing with an awkward item on a staircase, in a tight hallway, or through a period-property doorway, the risk climbs quickly. You do not want to discover that a wardrobe panel has a hidden weak point while half of it is hovering over a landing.
It also matters because reassembly is not simply the reverse of disassembly. To be fair, that is where many people get caught out. The item may need to be re-squared, re-levelled, re-tensioned, and checked for wear before it feels solid again. A bed frame that goes back together a little out of square can creak. A wardrobe door that is off by a few millimetres can scrape every time you open it. Small things become daily annoyances.
For commercial settings, there is another layer to think about: downtime. Offices, clinics, showrooms, and hospitality spaces often need furniture returned to service quickly. Safe handling protects not just the asset, but the schedule. That is one reason businesses often look at office removals and broader commercial moves support when furniture needs careful dismantling as part of a bigger relocation.
How Safe disassembly and reassembly for complex furniture Works
The process is simple in principle and fussy in practice. The goal is to break down a bulky item into manageable, clearly labelled parts, move those parts safely, then rebuild the item in the correct order with every fixing back where it belongs.
1. Assess the item before touching a tool
Start by checking the furniture from every angle. Look for visible screws, bolts, clips, dowels, hidden brackets, back panels, cable channels, and any parts that appear load-bearing. Is the item flat-pack, modular, bespoke joinery, or a one-off built-in? The answer changes your approach. A fitted wardrobe, for example, may be secured to the wall and ceiling, while a modular shelving unit may simply rely on cam fittings and internal cross-bracing.
2. Photograph everything
This is one of the simplest and most useful habits. Take photos of the whole piece, then close-ups of joints, hinges, shelf positions, hardware bags, cable routing, and any factory labels. A few minutes now can save an hour later. Honestly, it is the sort of step people skip right up until they are holding an odd bracket at 9pm wondering where it belongs.
3. Remove loose or delicate components first
Glass shelves, drawers, loose doors, removable feet, detachable handles, and soft-close units should usually come off before the main frame is moved. This reduces weight and prevents fragile parts from twisting under load. If there are upholstered sections, keep an eye out for hidden staples, clips, or fabric-fastened elements that may snag.
4. Label parts as you go
Use a clear system. A furniture item with left and right panels, top and base sections, and mixed fixings can become confusing quickly. Labels such as "left side panel," "top rail," "door A," or "wardrobe shelf 3" are much better than a loose pile of bits in a bag. Group fittings by section and tape the bag to the corresponding panel where practical.
5. Separate and protect all fixings
Screws, cam bolts, dowels, shelf pins, hinge screws, and connectors should be stored in sealed bags or compartment organisers. If there are multiple types of fixings, keep them separate. There is nothing exciting about playing detective with three nearly identical screws and no clue which one belonged to the drawer runners.
6. Dismantle in the correct order
Follow the structure of the item rather than forcing it apart. Usually that means removing doors, shelves, drawers, top panels, side panels, backboard, then base components. Some furniture has tension from the frame itself, so if a panel resists, check for concealed fixings before applying pressure. Forcing the issue is how chips, cracks, and bent brackets happen.
7. Move the parts safely
Once dismantled, each piece should be wrapped and positioned so it will not rub, warp, or snap in transit. Veneered surfaces need padding. Glass needs special care. Long panels should be carried upright with support. If you are using a man with van service or a dedicated moving van, make sure the load plan accounts for fragile sections and the order they will be unloaded.
8. Rebuild slowly and check alignment
Reassembly should begin with the base or main structural frame, then move into the supporting sections, then doors, shelves, drawers, and final adjustments. Level the unit before tightening everything fully. If you fully tighten one side too early, the frame can twist slightly and never quite sit right again. That tiny bit of patience pays back later.
Key Benefits and Practical Advantages
People usually think of disassembly as a nuisance, but the truth is it can be the thing that protects the value of your furniture. The benefits go well beyond getting a bulky item through the door.
- Less risk of physical damage: Panels are easier to protect when broken into smaller sections.
- Safer handling: Smaller parts are easier to carry through stairs, corridors, lifts, and narrow spaces.
- Better moving efficiency: A dismantled unit often loads more neatly and securely.
- Improved reassembly accuracy: Good labelling and photos make the rebuild smoother.
- Reduced strain on people: Fewer awkward lifts and less twisting.
- Lower chance of surface scuffs: Wrapped pieces are easier to isolate from rough surfaces.
- Longer furniture life: Careful handling reduces cumulative wear on joints and fittings.
There is also a practical planning benefit. If you know a bed frame, wardrobe, or boardroom table will come apart properly, you can plan the move around that fact instead of leaving it to chance. That often means a cleaner packing process too, especially when combined with packing and unpacking services.
Expert summary: The safest approach is not the fastest one, but the one that keeps every fixing, panel, and surface accounted for from first screw to final adjustment. A well-documented dismantle makes reassembly calmer, quicker, and far less risky.
Who This Is For and When It Makes Sense
This process is not just for oversized wardrobes or antique dining sets. It is useful anywhere furniture is complex, valuable, awkward, or fixed in a way that makes moving difficult.
Households
Homeowners and tenants often need this for wardrobes, ottoman beds, bunk beds, modular sofas, desks, large bookcases, and fitted storage. If you are moving house, careful dismantling can be the difference between a smooth day and a lot of muttering in the hallway. Many families pair this with home moves or house removals when there is more than just one awkward item to shift.
Landlords and letting agents
Furniture in rental properties takes a battering. If a tenant leaves a large bed or wardrobe behind, or if items need to be moved between properties, safe dismantling helps prevent avoidable damage and makes storage easier.
Offices and commercial spaces
Boardroom tables, reception desks, storage walls, and modular office systems often need special care. In offices, time matters, but so does consistency. It is not enough to just "get it out"; the item often has to be rebuilt in a new layout with minimal interruption. That is where experienced teams handling office relocation services can make life much easier.
Furniture sellers, buyers, and clearance jobs
If you are collecting or selling a large item, dismantling can make transport manageable and reduce the chance of returns caused by damage. It is especially useful if the piece has to go through a flat entrance or into a smaller van. For one-off collections, furniture pick-up support is often the simplest route.
When it makes less sense
If the piece is very old, badly damaged, or built with fragile joinery that has already loosened, dismantling may create more risk than it solves. In those cases, professional assessment is the safer call. Some furniture is simply not designed for repeated breakdowns, and pretending otherwise is a good way to hear an expensive crack.
Step-by-Step Guidance
Here is a practical process you can follow for most complex furniture, whether you are handling it yourself or preparing it for movers.
- Clear the area. Make space around the piece and protect floors and skirting boards. It is easier to work cleanly than to dodge a pile of cushions and a vacuum cable.
- Check for wall fixings. Look for brackets, straps, or anti-tip fittings. Remove them carefully and keep the screws together.
- Empty every compartment. Drawers, shelves, trays, and hidden storage areas should be cleared before dismantling.
- Take wide and close-up photos. Capture the original structure and all fitting positions.
- Label the item by section. Use tape, tags, or numbered notes. Keep left/right and top/bottom clearly separate.
- Remove doors and drawers first. This reduces weight and helps avoid hinge damage.
- Undo the main frame systematically. Work from the outside in, checking each joint before applying pressure.
- Bag and label all fittings. Keep hardware grouped by section and taped to the right panel if possible.
- Wrap and protect surfaces. Use blankets, paper, foam, or specialist protective covers depending on the material.
- Load for stability. Keep panels upright where safe, protect corners, and avoid stacking heavy items on delicate parts.
- Reassemble in reverse order, but carefully. Do not rush the final alignment, especially on doors, runners, and hinges.
- Test the item once rebuilt. Open doors, slide drawers, and check for wobble, squeaks, or uneven loading.
A useful rule of thumb: if a fix looks as though it could be hiding tension, stop and inspect before pulling harder. Complex furniture often rewards patience more than strength.
Expert Tips for Better Results
There are a few small habits that make a large difference. Nothing flashy, just the sort of detail that keeps the day from drifting into chaos.
- Use separate labels for structure and hardware. One label for the panel, one for the screws, one for the odd bracket you will absolutely forget otherwise.
- Keep an order sheet. A simple note such as "door removed first, then top rail, then left side panel" is gold when you are rebuilding later.
- Protect veneer edges. Veneered and lacquered edges chip easily on stairs and doorframes.
- Watch for concealed load points. Some wardrobes and shelving units rely on a single hidden fastener to keep the frame square.
- Check the room before reassembly. If the new space has uneven floors, old radiators, or a lower ceiling, you may need a slightly different build order or more adjustment time.
- Re-tighten after settling. Once the item has been in place for a day or two, a few fittings may need checking again. That is normal.
- Use the right team size. One person can dismantle a small cabinet, but a large modular system needs more hands. There is no prize for trying to muscle through alone.
One more practical point: if the furniture came with factory instructions, keep them close. They are not always written brilliantly, but they are still better than guesswork.
Common Mistakes to Avoid
Most damage during disassembly and reassembly comes from a fairly small set of mistakes. Avoid these and you are already ahead.
- Using the wrong tool. A stripped screw head turns a simple job into a frustrating one very quickly.
- Forcing tight joints apart. If it resists, there is usually a reason.
- Mixing fixings together. Similar screws are not the same screws, even if they look suspiciously identical.
- Skipping photos. Memory is helpful until everything is in a bag and you are tired.
- Removing too much at once. Taking apart structural sections before identifying support points can cause collapse or warping.
- Over-tightening on reassembly. This can crack particleboard, crush cam fittings, or strip threads.
- Ignoring floor level. A unit may seem faulty when the real issue is the room itself.
- Leaving glass or mirrors unprotected. That is a risk you really do not want to test.
And yes, a lot of people forget to check the back panel. It is usually the least exciting part of the furniture and, naturally, one of the most important. Classic.
Tools, Resources and Recommendations
You do not need a full workshop to handle complex furniture, but the right tools make the job safer and cleaner. A small kit can go a long way.
| Tool or item | Why it helps | Best used for |
|---|---|---|
| Cross-head and flat screwdrivers | Common fixings across flat-pack and assembled furniture | Screws, hinge plates, brackets |
| Hex keys / Allen keys | Essential for many beds, desks, and modular systems | Cam bolts, frame connectors, furniture kits |
| Zip bags or compartment boxes | Keeps hardware organised | Bolts, screws, pins, hinges |
| Labels and marker pens | Reduces confusion during rebuild | Sections, panels, drawers, doors |
| Moving blankets and wrap | Protects surfaces in transit | Veneer, polished wood, painted finishes |
| Gloves | Improves grip and reduces minor cuts | Handling panels and metal edges |
| Tape measure and level | Useful when checking fit in the new space | Wardrobes, shelving, office systems |
| Soft cloths or foam edging | Prevents rub marks and corner knocks | Glass doors, shelves, corners |
For larger jobs, a removal team may also bring dollies, furniture straps, protective runners, and lifting equipment. If the item is moving as part of a wider household relocation, services like man and van removals or a more complete removal services package can keep the logistics much simpler.
If packing is part of the job, it may also be worth looking at packing and unpacking services so that furniture parts and household items are handled in a more organised way.
Law, Compliance, Standards, or Best Practice
For most households, the legal side is straightforward: you are responsible for making sure the item is handled safely and that any property damage risk is minimised. For businesses and landlords, there is usually more paperwork and a stronger expectation of due care. In the UK, good moving practice tends to centre on health and safety, safe manual handling, and sensible risk assessment rather than dramatic formalities.
The practical standard is simple enough: people should not lift, twist, or carry items in a way that creates avoidable injury risk. That means planning the route, using enough people, protecting surfaces, and choosing proper lifting methods. If furniture is heavy, awkward, or unstable, it is better to pause and re-plan than to push on because everyone wants to "just get it done".
For commercial moves, insurance and clear handling procedures matter even more. It is worth checking that the mover understands fragile items, dismantling requirements, and who is responsible for what during loading and unloading. A good provider will be open about this, and should be able to explain their insurance and safety approach in plain language.
Compliance also extends to responsible disposal. If disassembly reveals that a piece is beyond repair, recycling or reuse may be the best route. That is where a more thoughtful approach to recycling and sustainability becomes relevant, especially for old office furniture or bulky items that can no longer be rebuilt safely.
If you are arranging a wider move, it is sensible to review the provider's terms and conditions and payment arrangements too, so everyone understands expectations before the first screw is removed.
Options, Methods, or Comparison Table
Not every item needs the same level of intervention. Sometimes a simple partial dismantle is enough. Other times, especially with fitted or modular furniture, the full process is the safer call.
| Method | Best for | Pros | Watch-outs |
|---|---|---|---|
| Leave item assembled | Small, sturdy pieces with clear access | Fastest option; less handling of parts | Higher risk of damage in tight spaces; may not fit through doors |
| Partial disassembly | Beds, desks, wardrobes with removable doors or legs | Balances speed and safety | Can still be awkward if hidden fixings remain |
| Full disassembly | Large modular units, fitted furniture, complex systems | Best for access, protection, and transport control | Requires careful labelling and more time |
In real life, the best method depends on the item, the room, and the route out of the property. A staircase with a sharp turn can change the plan instantly. So can a narrow lift, a low ceiling, or a wall-mounted section that looked harmless at first glance.
Case Study or Real-World Example
Picture a family moving from a first-floor flat in a Victorian terrace. The bedroom contains a large sliding-door wardrobe, a king-size bed with storage drawers, and a tall chest of drawers. The wardrobe will not fit down the stairs assembled. The bed can move in sections, but only if the slats, base frame, and drawers are removed in the right order.
The move starts with photographs and labels. Doors come off first, then shelves, then the top rail and side panels. Each fitting is bagged and taped to the relevant section. The panels are wrapped in blankets and kept upright in the van. The bed frame is dismantled carefully, with the drawers marked left and right so they go back correctly later.
At the new property, the wardrobe is reassembled before the room is fully cluttered with boxes. That matters because you need space to square the unit and check the sliding track. The bed is rebuilt next, with the base levelled against the floor. A quick check shows one hinge needs a tiny adjustment, and the runners need a minor tighten. Nothing dramatic. Just the sort of tidy finish that makes a move feel under control rather than frantic.
That is really the point: safe disassembly and reassembly is not about making furniture "look moved". It is about keeping the item usable, stable, and properly aligned when the dust settles and the kettle is finally on.
Practical Checklist
Use this checklist before you start:
- Measure doorways, stair turns, lifts, and hallways
- Check whether the item is wall-fixed or floor-fixed
- Empty all drawers, shelves, and hidden storage
- Photograph the furniture from several angles
- Label panels, doors, and hardware separately
- Prepare bags or boxes for fixings
- Gather the correct tools before dismantling
- Protect floors, corners, and nearby walls
- Wrap fragile or polished surfaces
- Assign enough people for safe lifting
- Plan the rebuild order in advance
- Check alignment and stability after reassembly
If you are moving several bulky items at once, it can help to compare vehicle size and handling support before booking. For some jobs, a simple man with a van option is enough, while larger household or business moves may suit removals support or even a dedicated removal company.
Conclusion
Safe disassembly and reassembly for complex furniture is really a mix of planning, patience, and respect for how the item was built in the first place. Once you look at a wardrobe, table, or office system as a structure rather than just a bulky object, the process makes much more sense. You protect the furniture, reduce stress, and give yourself a far better chance of a smooth setup at the other end.
The big takeaway is simple: do not rush the dismantle, do not lose the fixings, and do not assume the rebuild will be obvious after a long day. If the item is valuable, oversized, or especially awkward, bringing in experienced help can save time and avoid costly mistakes. That peace of mind is often worth more than people expect.
And when the room is finally set again, with every door aligned and every drawer sliding properly, it feels quietly satisfying. Like the hard bit was handled properly. Which, frankly, is a nice feeling.
Get a free quote today and see how much you can save.
Frequently Asked Questions
What is the safest way to dismantle complex furniture?
The safest way is to assess the piece first, photograph it, remove loose parts, label every section, and dismantle it in a logical order rather than forcing panels apart. If the item feels unstable or has hidden fixings, stop and inspect before continuing.
Can I reassemble complex furniture without the original instructions?
Yes, often you can, provided you have clear photos, labelled parts, and a sensible hardware system. Many items can be rebuilt from visual reference alone, though fitted or modular furniture may still need a careful trial-and-check approach.
Which furniture items usually need professional disassembly?
Large wardrobes, fitted units, modular shelving, boardroom tables, beds with storage, and anything with glass, mirrors, or wall fixings are common candidates. If the item is heavy, delicate, or built into the room, professional help is usually the safer option.
How do you keep screws and fittings organised during a move?
Use small sealed bags, label them clearly, and keep fittings grouped by section. Taping the bag to the matching panel is often the easiest method. It sounds simple, but it saves a lot of confusion later.
What should I do if a screw is stripped or a fitting is stuck?
Do not keep forcing it. Switch to the correct tool, check whether the fitting is under tension, and use a gentler approach. If a screw head is stripped, it may need specialist extraction or replacement before the item can be rebuilt properly.
Is it better to dismantle furniture before moving house?
For complex or bulky furniture, yes, usually. Dismantling reduces the chance of damage, makes loading easier, and helps items fit through narrow access points. It is especially useful in flats, terraces, and properties with awkward staircases.
How long does furniture disassembly and reassembly usually take?
It depends on the item and how complex the hardware is. A simple bed frame may take a short while, while a large wardrobe or modular system can take much longer. Hidden fixings and tight access always add time.
Can complex furniture be moved in one piece if it fits through the door?
Sometimes, yes. But fitting through the door is only one part of the question. You also need to consider corners, stair turns, floor protection, and how stable the item will be in transit. One-piece moves are not always the safest choice.
What is the biggest mistake people make when rebuilding furniture?
Over-tightening or reassembling out of square is one of the biggest mistakes. If the frame is not level or aligned properly before final tightening, the item can wobble, creak, or sit unevenly for good.
Do I need special tools for complex furniture?
Often, yes. Hex keys, screwdrivers, labels, bags for fixings, protective wrap, and a level are the basics. Some pieces may need more specialised equipment depending on their design and weight.
Is safe furniture disassembly relevant for office moves too?
Absolutely. Office furniture often includes modular desks, storage walls, cabinets, and conference tables with hidden fixings. Careful dismantling keeps downtime lower and helps everything go back together in the right place at the new site.
What should I check after reassembly?
Check that doors close smoothly, drawers slide properly, shelves sit level, and the unit does not wobble. If anything feels off, make a small adjustment straight away rather than waiting for the problem to worsen.
Can disassembly help with storage as well as moving?
Yes. Breaking large items into smaller sections makes them easier to store safely and often protects surfaces from pressure damage. It also helps if the item will be put away for several weeks or months.
When should I stop DIY and call a professional?
If the furniture is very heavy, wall-fixed, irreplaceable, or already damaged, it is wise to step back. Sometimes the best DIY decision is knowing when not to do the DIY bit. That is not defeat; it is common sense.
What kind of move benefits most from professional furniture handling?
House moves with tight access, office relocations with multiple assembled systems, and jobs involving fragile or premium furniture benefit most. In those cases, structured support from experienced movers can save time and reduce risk.
If you are planning a more complex move, it may also help to review pricing and quotes early so you know what level of support fits your budget and your furniture.